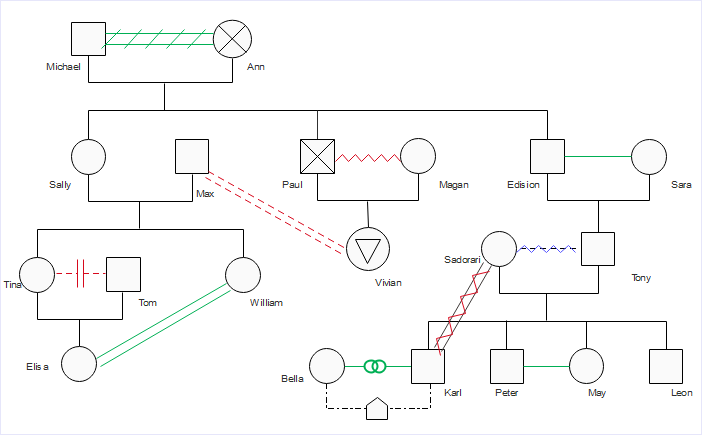
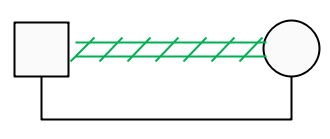
The genogram is a pictorial display of the relations of a family as well as includes family medical history. It can also be referred to as family genogram, a Lapidus schematic, or McGoldrick–Gerson study. A genogram example depicts hereditary patterns as well as psychological factors that form relationships. It can help reveal such information among individuals in a specific lineage.
1. Things to Consider Before Drawing Your Genogram
Before one starts to draw a genogram, they can take a look at the various kinds of genogram examples that are found. With software suites like Edraw Max, it is possible to create different images or illustrations and depict data in different ways. However, such data or charts would include sensitive medical information about a family. It could even involve describing emotional connect between various family members depending on the beliefs and stories gathered. Hence, one needs to be sensitive to how much of such information is to be displayed and in accordance with the beliefs and feelings of concerned members of a lineage.
Since medical formats can be quite detailed, if one needs to print or create professional finishes on such charts, there would be costs involved. Hence, such parameters need to be kept in mind when creating one’s genogram.
2. How to Draw Your Genogram?
Step 1: Collect Relevant Information
Among the steps involved in how to make a genogram, the first step requires an individual to draw up relevant information on their family. Generations that one wishes to display on such a chart, along with the kind of medical history they want to disclose, should be considered, and data gathered accordingly.
Step 2: Choose the Appropriate Template
Edraw Max has several pre-made templates available. One could choose one from the new section or even want to start with a blank canvas.
Step 3: Set Up Layout
This step involves setting out the layout gridlines as per the length and breadth of the chart you wish to create. It is especially crucial for digital prints or large size wall displays. The layout tab helps determine setup, background, theme, and other aspects.
Step 4: Add Content and Symbols
Once the layout is decided, one can then proceed to add text from the Home section. There are different vectors and symbols that one can insert onto the image, adding in the text in these blocks or boxes along with labeling.
Step 5: Export and Share Genogram
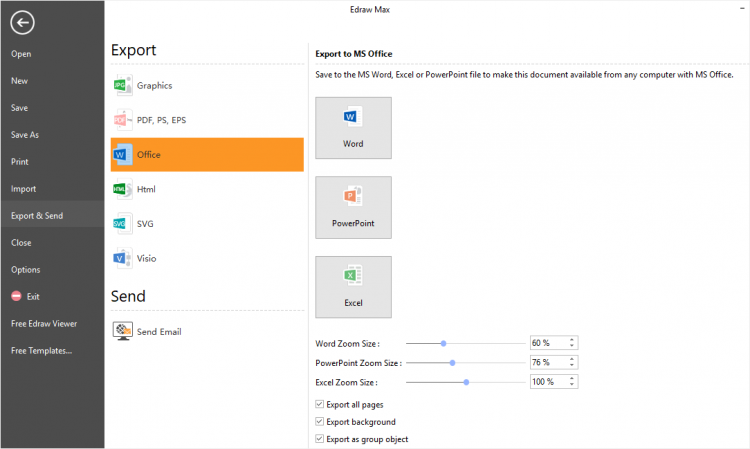
The software allows one to save the finished project in different formats such as JPG, PDF as well as export it to files such as MS Office or share it through various social media channels. Here export and Send options to come on the left-hand side panel of the software. It is also possible to save the file on local or cloud storage places. The Print option is also handy in helping you to print as per different sheet dimensions.
3. Tips for Creating an Ideal Genogram
To create an ideal genogram, the following steps come in handy:
· Know the Purpose
The need for creating a family genogram should be evident before one begins.
· Collect Information
As per the medical and psychological details to be displayed, one can proceed to collect information accordingly.
· Choose Genogram Structure
There are a different family tree and other diagram templates available to depict such relationships and data; one can choose a diagram as per the spread of information that needs to be portrayed.
Employee shapes are contained in organizational charts in order to display employee details, including names, titles, photos, contact information and so on. Now, we will show you how to edit your org chart employee shapes quickly.
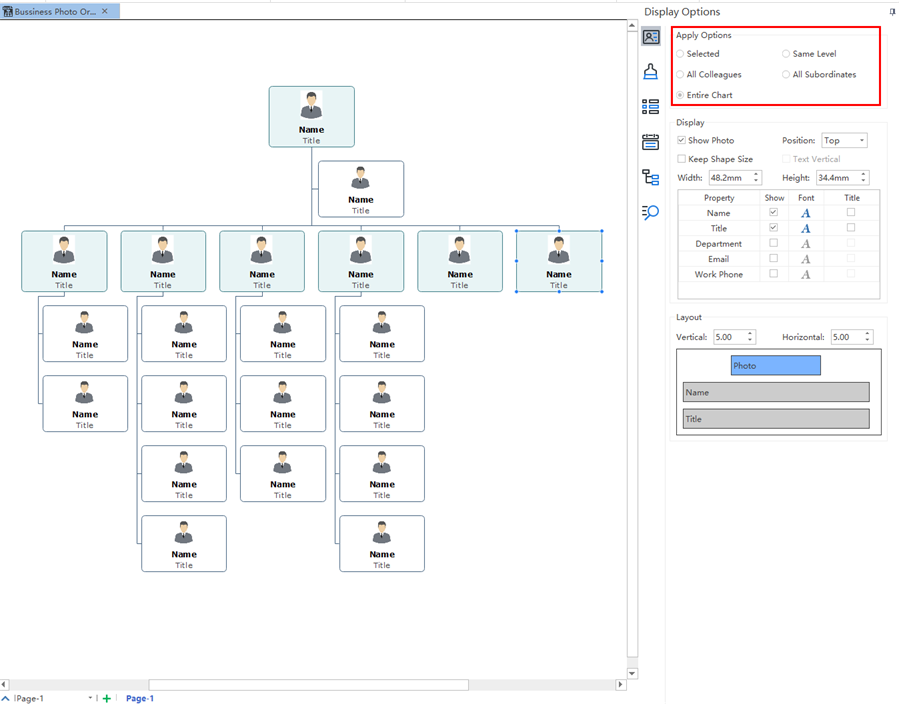
Step 1 – Choose Your Org Chart Apply Options
Simply free download this easy org charting creator. Once opened your organizational chart, click on the Display Options icon to choose your display preferences. For example, if you click on the Entire Chart, then all changes will be applied to the whole organizational chart.
Doing presentations are essential for business from small firms to large scale enterprises. For example, human resources managers can use slides to display key organizational structure and key departments during meetings. Today, we will show you how to create a presentation based on your org chart with a handy org charting application.
How to Create a Presentation based on Your Org Chart?
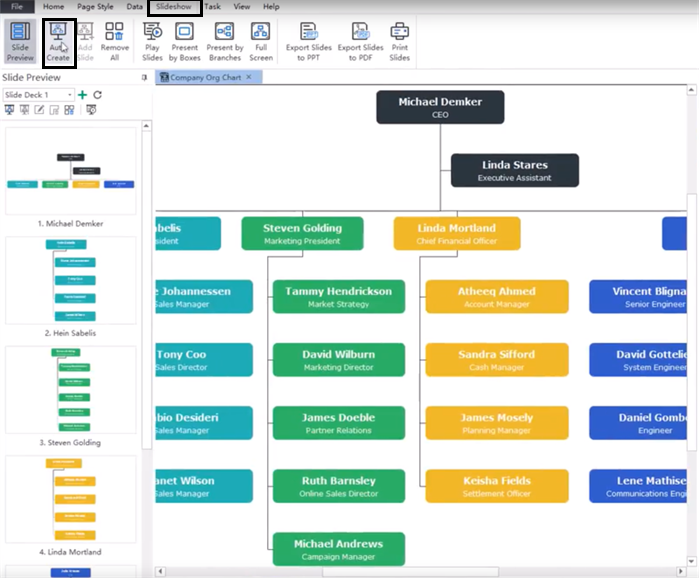
Simply free download this easy org charting creator, then open your organizational chart and go to Slideshow>Auto Create. A list of slides based on your current organizational chart will be shown at the left-hand side panel. You can also add a single slide, remove all slides, edit your slide name, and reorder your slides for your org chart.
Adding supportive materials to your organizational chart would help improve the productivity of human resources management. It’s also a great way to communicate with teammates from other departments. Today, we will show you how to insert hyperlinks, attachments, notes, and comments to your org chart!
How to Add a Hyperlink to Your Org Chart?
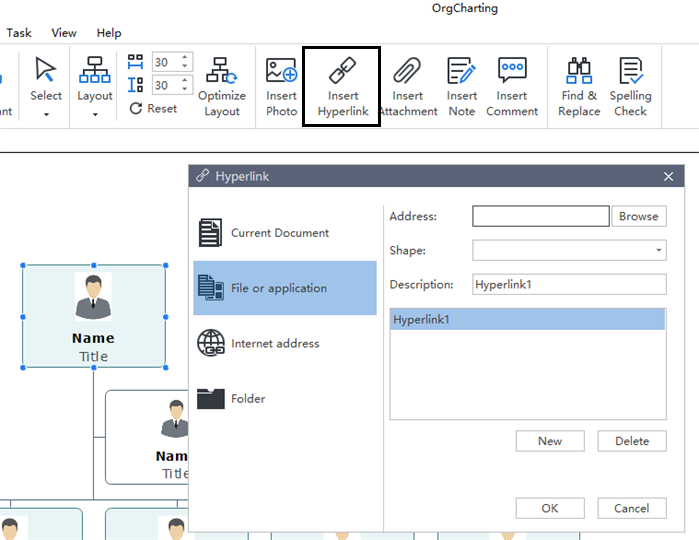
A hyperlink is convenient for org chart references as external documents including current documents, files and applications, and internet addresses. Here, we will take this free download easy org chart creator as an example. Simply select one of your employee shapes, then go to Home>Insert Hyperlink to add your links. You can also edit the link name or delete your existing links.
Employee data management is a very important factor in terms of organizational human resources management. Productive employee data importing and exporting would bring much convenience to your work. Today, let’s check out how to import and export your org chart within just a few clicks!
How to Import Your Org Chart Data?
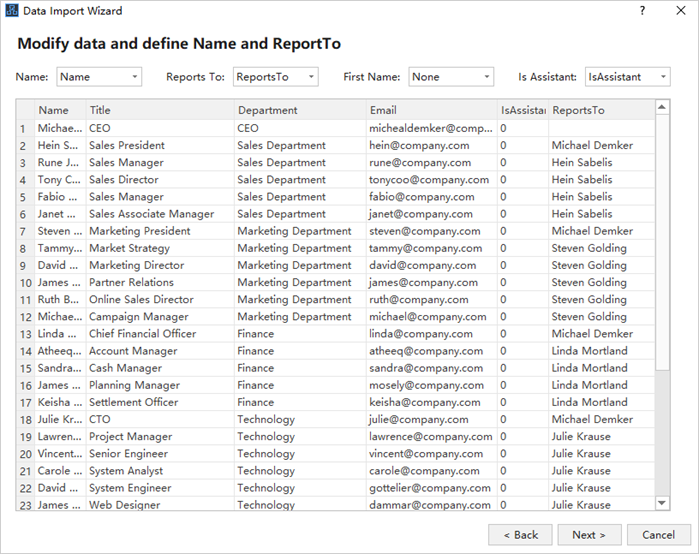
Here, we will use this free download easy org chart creator as an example to show you how it works. Go to Data>Import Wizard, then choose your local employee data file. In the next window, as shown below, you can modify data by changing employee names, titles, departments, and contact details. You also need to make sure that you have selected the ReportsTo option before you click on the Next button.
You may have seen lots of org charts with only a single color style. However, using a visually appealing org chart theme would help us to better sort and manage our teams. So, why not try a different taste today? The following steps will show you how to change org chart themes quickly.
How to Apply an Org Chart Theme?
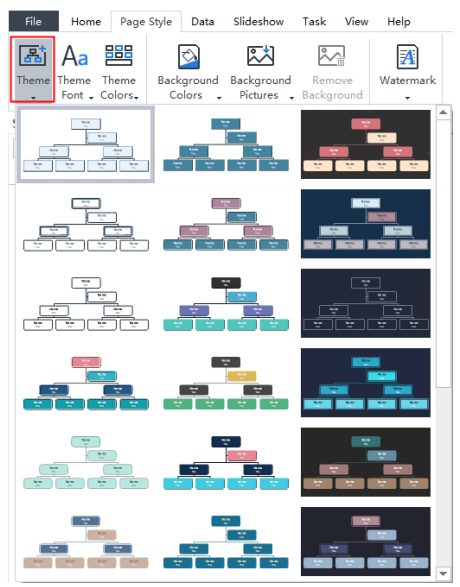
A chart theme is a collection of the default format settings used for the various types of elements in your chart, including a set of theme colors, theme fonts (both heading and body text fonts), and theme effects (both lines and filling effects). Simply free download this easy org chart creator, then go to Page Style>Theme to click on your preferred one. All changes will be applied at once.
Human resources management (HRM) is one of the most important parts of business long-term success. The standard HRM normally covers many sub-topics, such as the performance and pay, the training scheme, the workforce planning and so on. Today, we will see how to apply a predefined org chart vide mode to help you effectively manage your employees.
How to Apply a Predefined Org Chart View Mode?
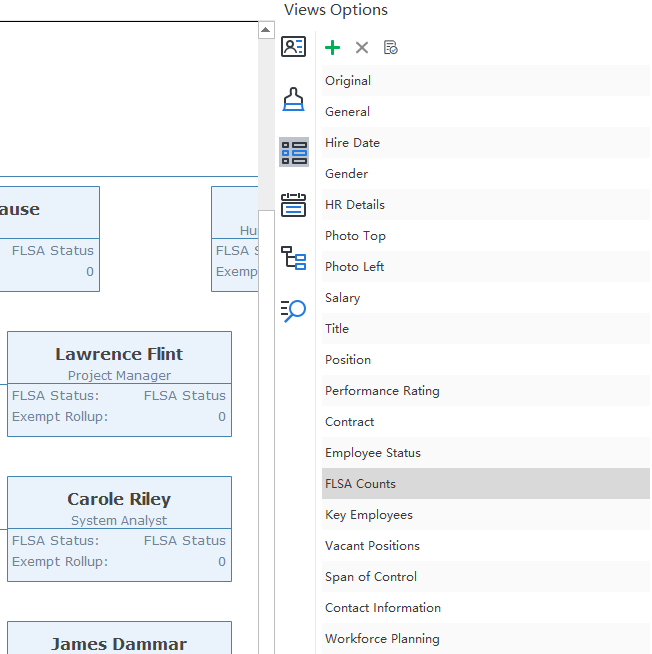
Simply free download this easy org chart creator, then go to the Views Options on the right-hand side panel of the user interface. You will see a list of the key human resources management factors. By clicking on any of them, your current org chart will be applied to the corresponding view automatically. For example, if we click on the FLSA Counts view, then our org chart on the left-hand side will be switched into the FLSA counts status.
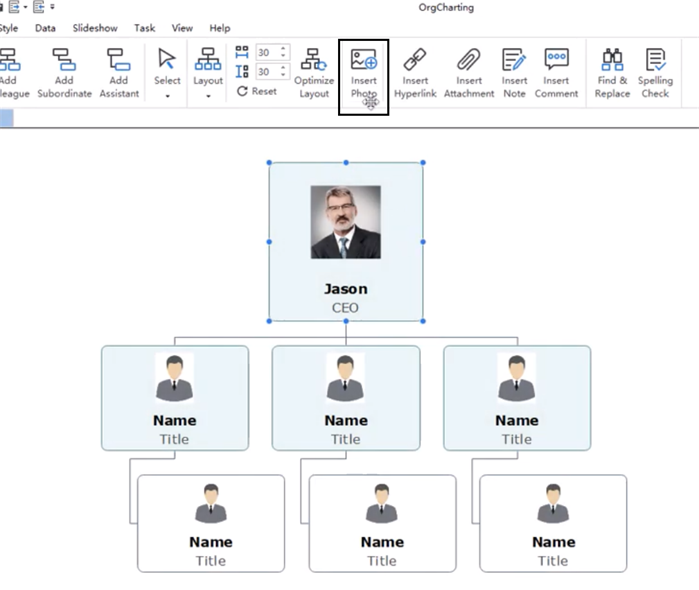
Organizational chart with employee photos would help human resources managers to quickly identify and sort the employee details. Nothing seems to be unclear when structural relationships are shown with the employee photos. Today, we will find out how to replace your organizational chart employee photos in different ways.
How to Replace Your Organizational Chart Employee Photos?
Simply do the following steps to add or replace your employee photos with this professional and easy org chart creator:
Option 1 – Go to the Insert Photo
You can first select the target employee shape, then directly click on the Insert Photo icon to replace or add your employee photos.
In reality, you may need to change your organizational structure according to the internal or external environment. In today’s article, we will show you how to change an organizational chart layout within a few clicks.
How to Change an Organizational Chart Layout?
The overall process is easy, just do the following steps:
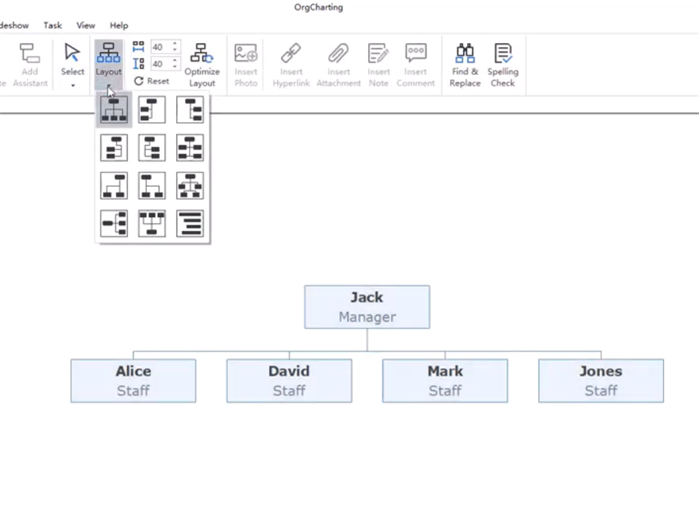
Step 1 – Go to the Layout Function
Simply open this free download org chart creator, then click on the Layout button. A list of different types of organizational chart layouts will be shown on the drop-down menu. Here, we gonna take a sample to show you how it works.
If you are working for the human resources department of a large-scale enterprise, then you may need to sort and check countless contact information details of your team. Are there any solutions to this? Today, we gonna show you how to create contact information organizational chart to improve your work productivity.
Contact Information Organizational Chart – What Is It?
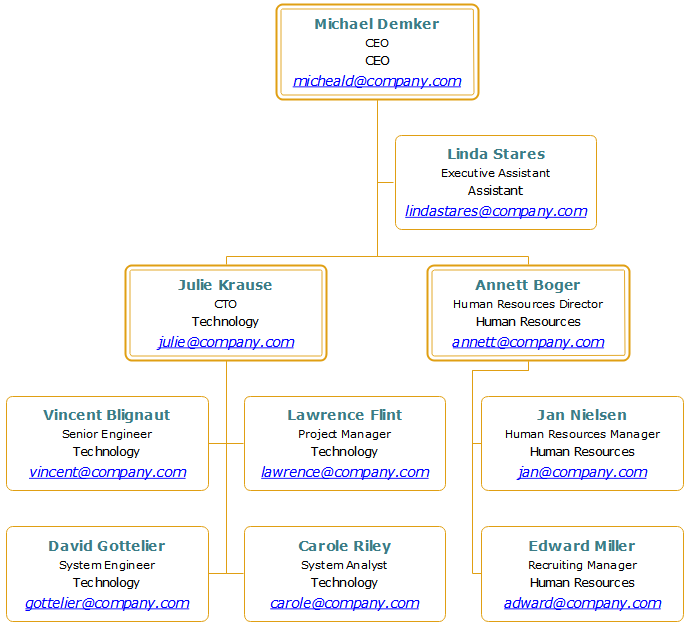
A contact information organizational chart covers an individual employee’s personal information by which the human resources manager can use to reach the individual. For example, the department name, the job title, the work phone, the work email and so on. Here is an example of the contact information organizational chart (click on it to enlarge):
